| Home » Categories » Multiple Categories |
Increased Selective Order Header Screens |
|
Article Number: 2246 | Rating: Unrated | Last Updated: Mon, Jun 19, 2023 at 4:43 PM
|
|
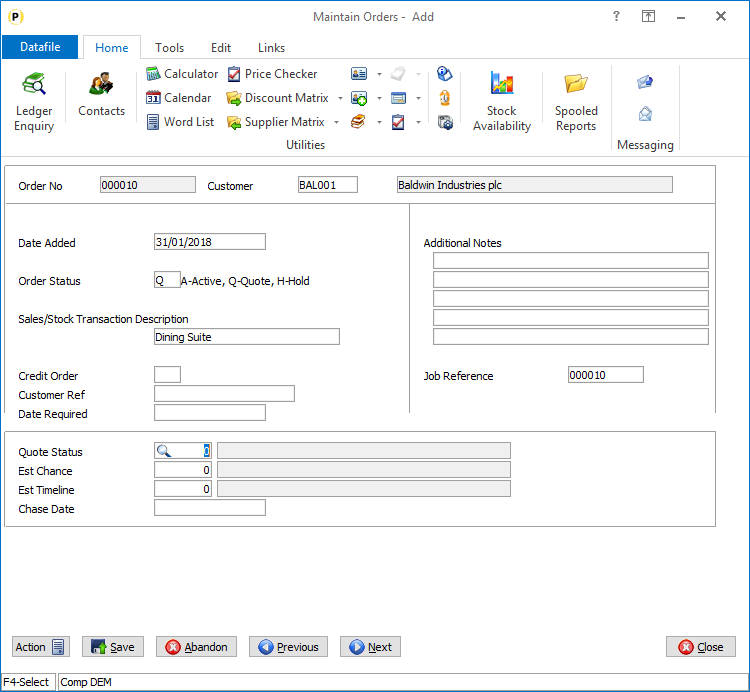
Datafile 2019 and above Sales and Purchase Order Processing allow for the user of two order header entry screens when entering sales/purchase orders and one further selective screen that is only displayed when the order matches the required criteria. This new feature increases the number of selective screens to 5.
Selective screens could be used to enter additional criteria for order types – for example when the order is a quote you could enter additional quote parameters, if the order is a credit you could enter additional credit reasons, and so on.
Installation
Application User Facilities
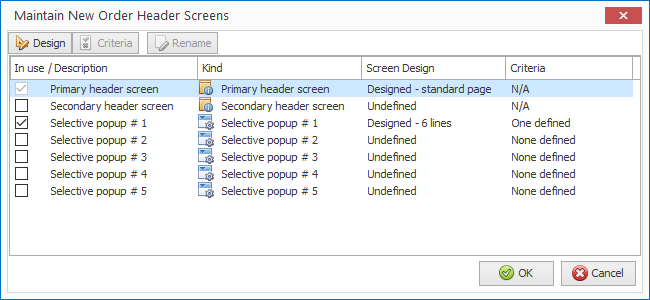
To configure selective screens Installerusers can right click on the explorer menu for Order Entry and select Configure Option. Alternatively, select Installation from the main menu followed by Application Manager and then Application User Facilities. Select the appropriate Order Processing application before selecting Enter/Amend Orders and Maintain New Order Header Screens
Highlight the screen required and then either right-click and choose Form Design or click the Design tab.
For a selective screen you are first prompted for the number of lines down the screen – maximum is 16 – after which the screen template is displayed.
You design the screen in the usual manner – enter text labels by position the cursor and typing, lines by switching to line mode on the design ribbon and then clicking and dragging with the mouse, add adding data items by positioning the cursor and using the <F4-Select> key.
Once the screen template is complete press the SAVE label on the Design ribbon.
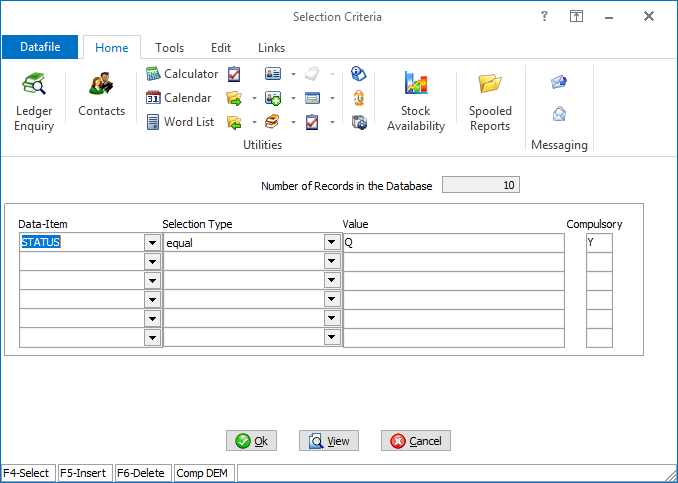
You can define the criteria under which the selective screen is displayed by highlighting the screen before right-clicking with the mouse and choosing Criteria.
Criteria is defined in the usual manner.
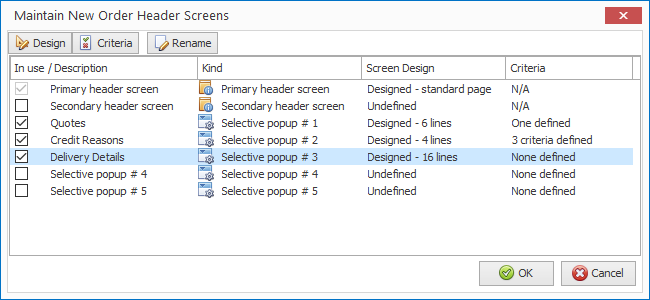
Lastly you can give the screen a title as an alternative to ‘Selective Screen 1’ etc. Right-click with the mouse and choose Rename and enter required title.
Note that screens are only ‘active’ when the ‘In Use’ tick box is set. |
Attachments

There are no attachments for this article.
|
Related Articles 
Order Entry - Additional Options for Hiding Stock Records from Selection
Viewed 478 times since Thu, Oct 24, 2024
Copy Items from Account to Order Header
Viewed 442 times since Tue, Oct 15, 2024
Extra Items in Quick Form Maintenance
Viewed 2296 times since Mon, Jun 11, 2012
Allow Use of Discount / Supplier Matrix Entries from Head Office Accounts
Viewed 3491 times since Fri, Jun 8, 2012
Currency Options
Viewed 1978 times since Tue, Jul 3, 2012
Revalue All Currency Orders
Viewed 1698 times since Tue, Jul 3, 2012
Order Acknowledgements / Purchase Orders - Application User Facilities
Viewed 2068 times since Wed, Jul 4, 2012
Remove Orders by Date
Viewed 1807 times since Tue, Jul 3, 2012
Staged Payment Schedule (SOP Only)
Viewed 2934 times since Fri, Apr 8, 2016
Operational Considerations
Viewed 1938 times since Tue, Jul 3, 2012
|
| Datafile Home | KB Home | Advanced Search |
|
 |
|
|
|
|
|
|