| Home » Categories » Solutions by Business Process » System Features |
General System Options - Email Address Format Validation |
|
Article Number: 2331 | Rating: Unrated | Last Updated: Thu, Oct 17, 2024 at 1:15 PM
|
|
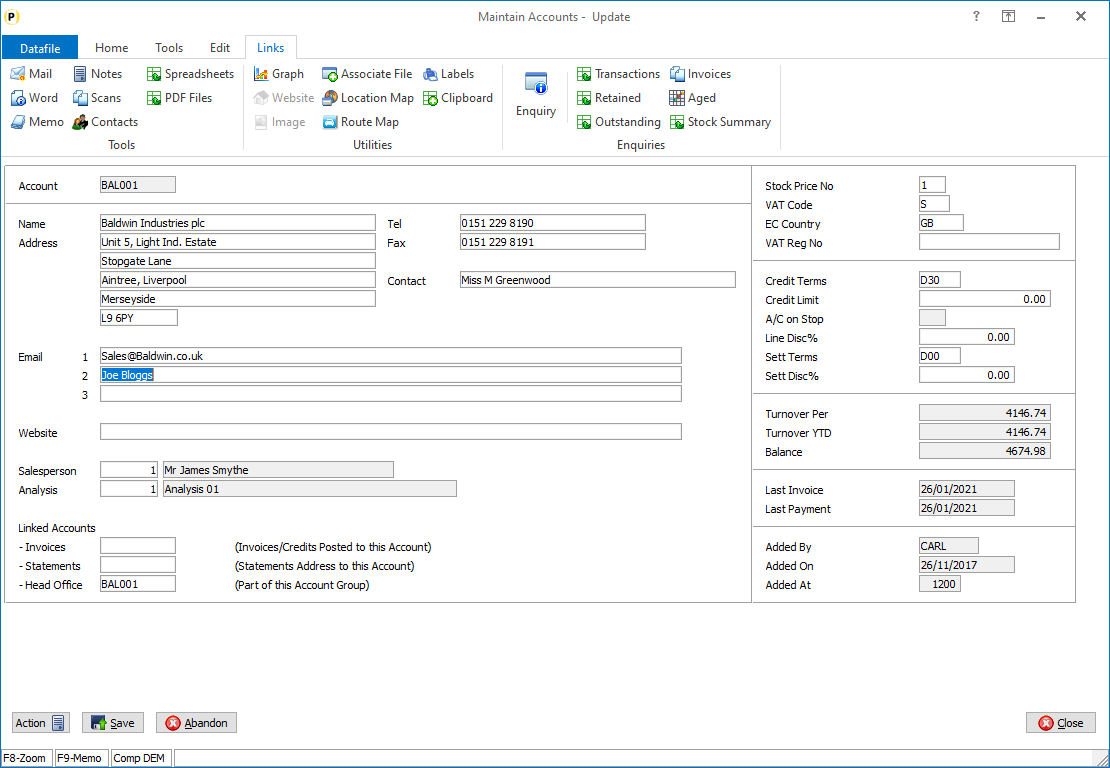
Within the Datafile system you may have items allocated as email addresses for use when raising documents for statements, order acknowledgements and invoices. You may also have emails recorded for sales and/or purchase contacts. Within Datafile these are standard ‘text’ data items, so users can enter any text causing issues when raising automatic document runs (where Outlook etc. with report an error with the address). This new feature allows you to apply email format validation when updating email data items.
If adding / updating, for example, a customer account once set the system will not accept entry of an email address then doesn’t match standard email validation rules. The email address must contain a prefix (characters to left of the ‘@’ sign) and a domain (characters to the right of the domain) Formatting rules are that an email address must contain both a prefix and a domain and a @ sign. The domain must include a ‘.’. Allowed characters are:
Installation To apply the formatting rules, you need to reference the data item as a ‘mail’ item within the INI file for that database. Database Changes Changes are required to the application database to define a text item as a ‘mail’ item. To reference an item for an application database, select Installation from the main menu followed by Application Manager and then Restructure a Database. Select the required application and elect to update the Live Files and then select the appropriate application file. When the data items are listed press <F5> to access the INI settings. 
You can move up/down the list of data items using the NEXT/PREVIOUS buttons or the <Page-Down> and <Page-Up> keys. Against the appropriate data items tick the ‘Mail’ flag against the email addresses and then click SAVE to return to the list of data items. Once the required items have been set and you are back on the data items list press the <ESC> key and select the UPDATE button to save the database changes. Provided no structure changes have been made the database INI will be updated. If you have made additional changes then when prompted respond ‘Y’ to the prompts to ‘Extract Existing Data to New Database Structure’ and, if appropriate, ‘Copy Table Entries from Old Database to New Database’.Final prompts ask to ‘Remove (.OLD) Database’ and to ‘Carry Out the Same Restructure on the BASE File as well’ – respond as required. If you select to update the base file you need to manually insert the new items at the same data item positions as on the live file.
|
Attachments

There are no attachments for this article.
|
Related Articles 
Label Printing
Viewed 2984 times since Wed, Jun 13, 2012
Additional Display Options for Nominal / Cashbook Enquiry
Viewed 3204 times since Fri, Oct 26, 2012
Warehouse Tablet - Order Header and Order Detail Confirm Items
Viewed 568 times since Wed, Oct 23, 2024
Compress Address Lines and Post Code
Viewed 3904 times since Wed, Jun 13, 2012
Application Memo Options
Viewed 2890 times since Tue, Jun 12, 2012
General System Options - Copy a User Id
Viewed 561 times since Thu, Oct 17, 2024
History Database Cross-Links
Viewed 3245 times since Tue, Jun 12, 2012
Screen Design - Allow 64 Data Items per Screen Layout
Viewed 3861 times since Mon, Jun 11, 2012
Additional Filter Option on Stock Transaction Enquiry
Viewed 2575 times since Tue, Jun 12, 2012
Custom Page Sizes
Viewed 2936 times since Wed, Jun 13, 2012
|
| Datafile Home | KB Home | Advanced Search |
|
 |
|
|
|
|
|
|