Existing functionality allows you to restrict access to customers by linking a customer record to a salesperson. If the Datafile user-id has a salesperson assigned then when viewing, updating, or reporting on customer accounts or sales orders they can only view customers and orders that are linked to their salesperson id. Other users who don’t have a salesperson assigned can see all customers and sales orders
This new feature extends this facility. Against each user you now also have the option to assign a Department ID. If set then only customers or sales orders linked to that department id can be viewed, updated, or reported against. In addition, the Department restriction extends to suppliers, purchase orders and stock records.
Options to set a list of departments and to assign a department to a user are part of the MASTER sign-on configuration options.
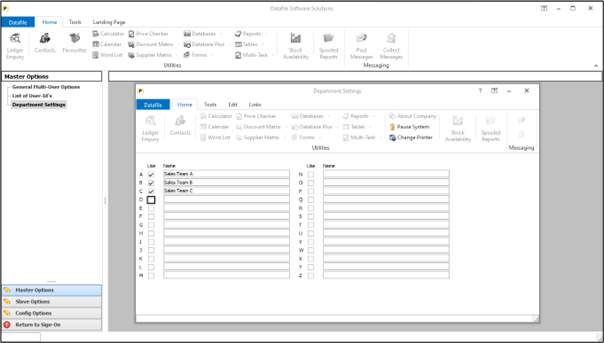
Selecting the Master option for Department Settings allows you to define up to twenty-six departments and to set that the department is in use. Update as required.

The List of User Ids option allows you to define the users who can access the system – within the individual user parameters is the option to set the users Department ID
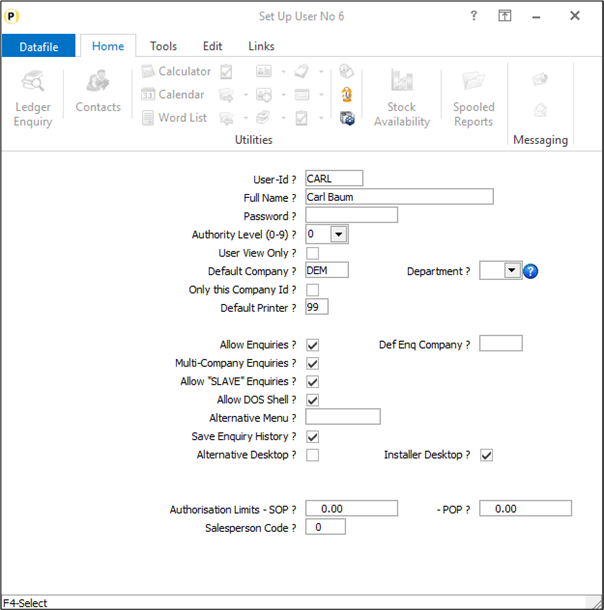
Once a department is assigned to a user then only customers, suppliers, stock items, sales and purchase orders that have a matching department applied to it will only be accessible for the user.
When the customer or supplier landing page is displayed if the user does not have a department restriction applied then all records are displayed.
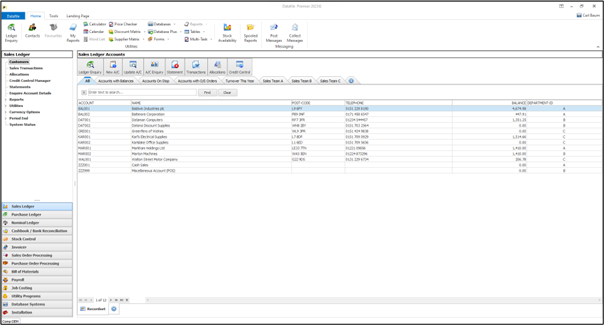
However, if a user has a department restriction applied, then only those customers/suppliers with a matching department id are displayed.
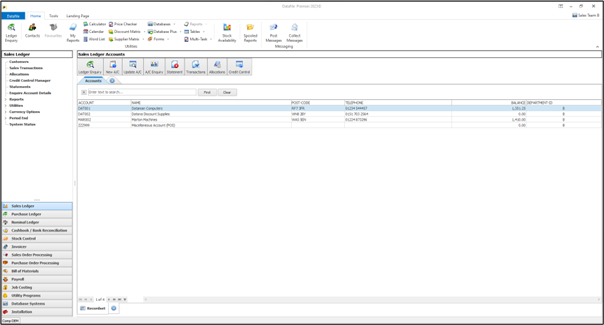
Restrictions to the matched departments applies throughout the Sales and Purchase Ledger –account maintenance, direct transaction posting, accounts and transaction reports will all restrict access to those accounts where the departments match the user-id.
In addition, similar restrictions are applied to customer/supplier selection within Ledger Enquiry and Adding New Sales and Purchase Orders.
As with Customers/Suppliers when the Stock Records landing page is displayed then if the user has a department restriction applied then only those stock records with a department match are listed.
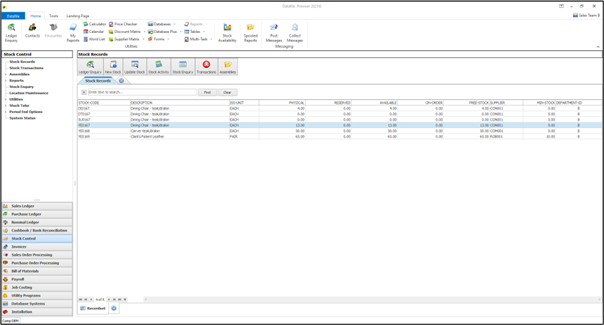
Restrictions to matched departments applies to features throughout Stock Control including Stock Maintenance, Direct Transaction Entry, Reports and Stock Take. In addition, similar restrictions are applied to the Stock Ledger Enquiry and to entry of new order lines within sales and purchase order processing (once the stock code has been selected for an order it can be amended/processed subject to department restrictions on the account/order).
Restrictions apply to the stock record selection – where location stock is in use each location is available for selection and the resulting stock items available for that location restricted by the department match. Similarly, batch/serial items are available for selection if the stock item is allowed for selection.
When creating new sales or purchase orders the primary restrictions will be driven by any customer/supplier or stock restrictions. A user would not be able to enter a new order for a customer/supplier whose department doesn’t match that of their user id. Similarly, they would not be able to select a stock code where the department doesn’t match.
Once the Sales/Purchase Order has been created the restrictions are based on the department code on the Order Header/Line. This will typically be set based on the department code from the customer/supplier.
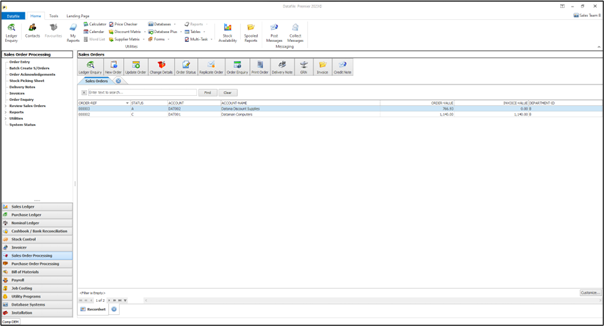
Restrictions to matched departments apply throughout Sales and Purchase Order Processing including Order Entry, Document Production and Reports. In addition, restrictions are applied to the Ledger Enquiry for Sales and Purchase Orders.
Database Changes
Changes are required to the Sales Accounts/Transactions, Purchase Accounts/Transaction, Stock Records/Transactions Sales Order Header/Detail and Purchase Order Header/Detail databases to record the department id. You only need to add the item to databases you wish to restrict access to.
To add the item, select Installation from the main menu followed by Application Manager and then Restructure A Database. Select the required application and elect to update the Live Files and then select the appropriate application file.
To insert a new item press <Enter> against a blank entry, enter the title as required and press <Enter>, select the item type (using the drop-down list if required), and depending on item type select the size required.
File Item Name Type
SLA DEPARTMENT X (1)
SLT DEPARTMENT X (1)
PLA DEPARTMENT X (1)
PLT DEPARTMENT X (1)
STA DEPARTMENT X (1)
STT DEPARTMENT X (1)
SOH DEPARTMENT X (1)
SOD DEPARTMENT X (1)
Once the required items have been recorded press the <ESC> key and select the UPDATE button to save the database changes. When prompted respond ‘Y’ to the prompts to ‘Extract Existing Data to New Database Structure’ and, if appropriate, ‘Copy Table Entries from Old Database to New Database’. Final prompts ask to ‘Remove (.OLD) Database’ and to ‘Carry Out the Same Restructure on the BASE File as well’ – respond as required. If you select to update the base file you need to manually insert the new items at the same data item positions as on the live file.
Set Database Profiles
The new data items require referencing within the Database Profiles for the applications. To update the profiles, select Installation and then Application Managerand then Set Database Profiles.References are required in each of the main applications discussed and the following parameter screens contain the options to reference the new Department item.
Sales Ledger Account Optional 4
Trans Optional 4
Purchase Ledger Account Aged Analysis
Trans Optional 4
Stock Control Stock Batch/Call
Retail / Other Trans
Sales Orders Header Optional 4
Detail Optional 6
Purchase Orders Header Optional 4
Detail Optional 4
Reference each of the Department Code profiles to the item required.
In addition to the references against each of the databases you will need to define copy items to carry the department codes from the accounts to the transactions, orders, etc.Suggested copy items required would be:
Sales Ledger / Copy Acc to Trans – define copy item of department code from account to transaction.
Purchase Ledger / Copy Acc to Trans – define copy item of department code from account to transaction.
Stock Control / Copy Stk to Trans – define copy item of department code from stock record to transaction.
Sales Orders / Acc to Hdr – define copy item of department code from sales account to sales order header.
Sales Orders / Hdr to Det – define copy item of department code from the order header to order detail.
Purchase Orders / Acc to Hdr – define copy item of department code from sales account to sales order header.
Purchase Orders / Hdr to Det – define copy item of department code from the order header to order detail.
Application Screen Layouts
If applying the department restrictions to a customer, supplier, or stock record then an option to set/amend the department id is required.
Installer users can right-click on the options for customer, supplier or stock maintenance and select to configure option. Alternatively, select Installationfrom the main menu followed by Application Manager, Application User Facilities and then the application required. Select the main maintenance option and then the screen to ‘add’ new records.
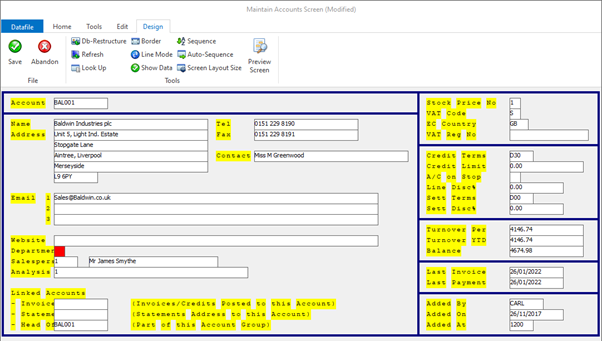
Screen Design is in the usual manner - To insert text labels such as ‘Department’ use the mouse to position the cursor where required and then type the required text. To insert the data item, position the cursor where required and press the <F4-Select> key and choose the data item required. Set whether items are view-only, mandatory or require uppercase input as required.
Article ID: 2370
Created On: Wed, Oct 23, 2024 at 3:02 PM
Last Updated On: Wed, Oct 23, 2024 at 3:05 PM
Online URL: https://kb.datafile.co.uk/article/restrict-access-by-department-2370.html